
Vacuum Seal Bags for Hunters: The Field-to-Freezer Guide to Stopping Freezer Burn
Vacuum Seal Bags for Hunters: The Field-to-Freezer Guide to Stopping Freezer Burn
Quick Answer
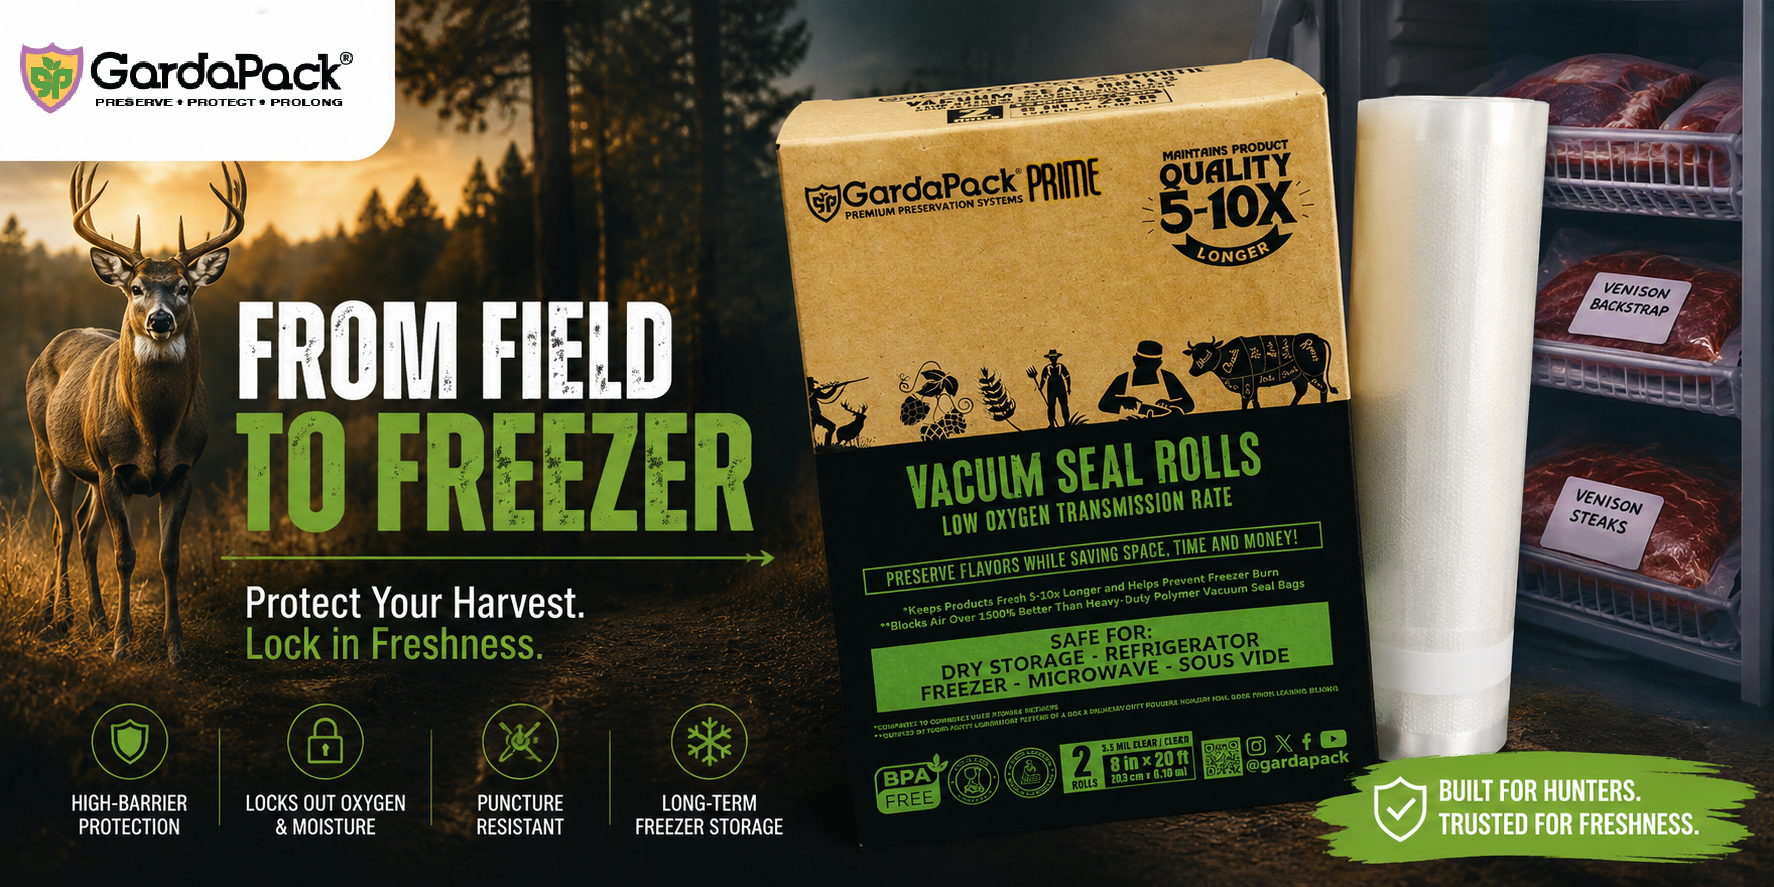
If you are a hunter, you already know how much time and effort you invest in the hunt. And now you don’t want to waste a single bit of it. This is where GardaPack’s Prime Bag comes in.
GardaPack Prime’s high-barrier film is engineered to limit oxygen and moisture transmission, helping protect your harvest when it is packaged properly.
Whether you’re processing a deer, elk, or fish, the right vacuum seal bag can help reduce moisture loss and limit oxygen exposure, two factors that can contribute to freezer burn.
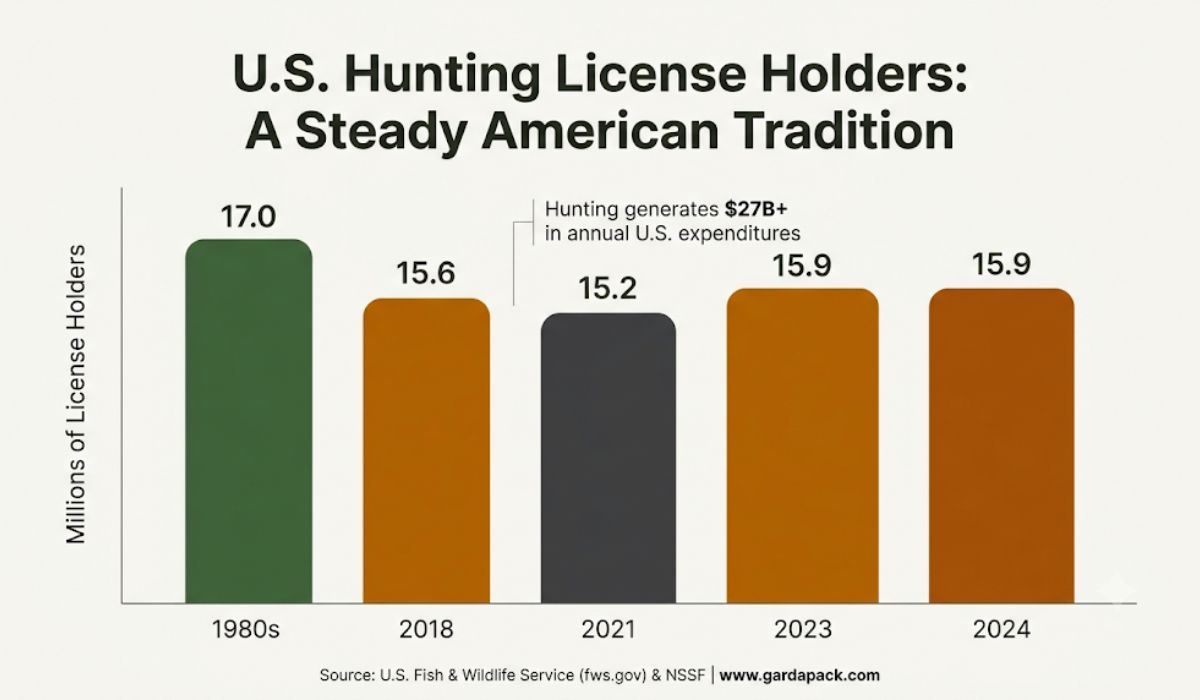
“U.S. Fish & Wildlife Service hunting-license data shows the enormous scale of hunting participation across the country.” (Source)
As hunting participation has grown nationwide, so have complaints about vacuum bag quality and poor performance.
You Did Everything Right in the Field. Then the freezer ruined it anyway.
You made a clean shot. You got the deer to cool down fast. You aged it right, trimmed it carefully, and portioned it into steaks.
You ran every package through the vacuum sealer, and it looked perfect: tight, sealed, ready.
Eight months later, you pull out a roast, and it’s gray at the edges, leathery, and smells faintly off.
Here’s the part that stings: the bag looked sealed the entire time. There was no sign it was failing. There was no warning, no visible leak, no moment when you did something obviously wrong.
If this has happened to you, you’re not alone, and you didn’t do anything careless.
Today in this guide, we’ll show you exactly why this happens and how GardaPack’s Prime Bags are engineered to close that gap, so the work you put in from field to freezer actually holds.
What a Ruined Package Actually Costs You
Now take a look at what you actually put in this bag to store it in the freezer.
- The hours. You did the field-dressing in the heat or the cold. Hauling out. Skinning, aging, trimming, cutting, wrapping a whole deer easily takes multiple hours of hard work from field to freezer, done right.
- The money already spent. Tag, license, gas, gear, ammo, maybe a processor’s fee on top of your own time — all sunk before the meat ever reached the bag.
- The trust you placed in “vacuum sealed.” You did the one thing everyone tells you to do. The bag didn’t hold up its end, and you had no way to know until it was too late to fix.
And here’s the frustrating part: this isn’t rare.
Poor sealing quality, air exposure, moisture loss, and punctures damage your hard-earned meat.
The Field-to-Freezer Workflow at a Glance
Here’s the full journey from field to freezer and how to protect your harvest at every step.
1. Field-Dressing & Cooling: Protect the Foundation
Bacteria grow fastest between 40°F and 140°F, doubling in as little as 20 minutes in that range. Get the cavity open, organs out, and the carcass cooling fast.
- Warm weather (above ~40°F ambient): don’t wait to ice the cavity; consider skinning early and get airflow moving immediately.
- Cold, late-season conditions: hanging in the shade with good airflow may be enough on its own.
- Target before freezing or aging: 32–40°F throughout, checked with a thermometer, not guessed at.
2. Aging: Your Last Checkpoint Before Permanently Storing Your Harvest
Aging at 34–37°F for roughly 5–7 days depending on cut and preference lets natural enzymes tenderize the meat measurably. A few things worth knowing:
- Aging stops the moment meat freezes and doesn’t resume after thawing.
- Very lean carcasses can dry out over long aging windows.
- Off odors during aging mean discard, not “cook it hot enough.”
3. Butchering & Trimming
No bag, however good, compensates for what you leave in it.
- Trim fat close. Wild game fat turns rancid faster than the muscle around it, even inside a high-barrier bag; leaving it in starts the oxidation clock early.
- Cut clean. Ragged, torn fiber from a dull knife creates more exposed surface for oxygen and moisture to act on than a clean cut. A clean cut is a smaller target for freezer burn to hit.
Where the Real Protection Actually Comes From: Field to Freezer, Step by Step
The good news is that once you understand what causes freezer burn, preventing it becomes much easier. The right packaging is one of the final pieces of the field-to-freezer process.
It comes down to a few things you can control, done in the right order, followed by packaging that can handle the long-term freezer storage you expect.
The Workflow
| Stage | Goal | Where freezer burn risk begins |
| Field-dress & cool | Remove organs, drop internal temp fast | Warm meat sealed later traps condensation |
| Skin & age | Improve tenderness, protect surface | Poor airflow during aging dries/discolors surface |
| Butcher & trim | Separate cuts, remove silverskin and fat | Sloppy trim leaves fat that oxidizes fastest |
| Package | Remove air, block oxygen and moisture migration | Packaging and sealing play the most important role in limiting moisture loss and air exposure |
| Freeze & store | Hold at 0°F or below, organized by date | Temperature swings and poor rotation compound bag failures |
Understand the Enemy: What Freezer Burn Actually Is
Here’s the part nobody tells you: a bag can look perfectly sealed and still fail you.
Two things are working against you inside that freezer, even after the vacuum sealer does its job.
First, moisture. The surface of the meat is slowly turning to vapor even at 0°F, and that vapor has to go somewhere. If the bag lets it through, it ends up as ice inside the wrap, and what’s left on the meat is that dry, gray, leathery patch you know all too well.
Second, air. Even a tiny bit of oxygen trapped in the bag — or sneaking in slowly over months — reacts with the meat’s surface. That’s what gives meat with freezer burn its flat, cardboard taste.
The Fix: A Vacuum Bag Built for Long-Term Freezer Storage
Long-term freezer protection comes down to two things packaging professionals measure: oxygen transmission rate (OTR) and water vapor transmission rate (WVTR).
In simple terms, these measurements tell you how much oxygen and moisture can pass through the film over time.
That’s exactly why GardaPack’s Prime Bags are built with a high oxygen & moisture barrier, so your meat stays protected.
How Do GardaPack’s Vacuum Seal Bags for Hunters Fit In?
- Barrier performance matters more than thickness. GardaPack’s vacuum seal bags for hunters are explicitly built and rated as high-barrier for long-term freezer storage, not general kitchen bags.
This is the difference between a season’s harvest that holds and one that doesn’t.
- Embossed vs. smooth. Embossed (channeled) bags suit external suction sealers; the channels let air escape evenly.
Smooth bags suit chamber sealers, which pull air from the whole chamber. Mismatching these is a common, invisible cause of weak seals.
- Rolls vs. Pre-cut. Rolls handle oddly shaped cuts and reduce waste on a mixed-size season. Pre-cut bags speed up high-volume, repeatable portioning.
Seal Integrity: Catching Failures Before They Cost You a Season
A bag sealed correctly on day one can still fail months later. The usual culprits:
- Bone punctures and pinholes — sharp edges slowly working through film over months of handling. Pad bone ends before sealing.
- Moisture or fat on the sealing surface — prevents a full, even weld and is the single most common cause of a seal that looks fine but leaks air back in.
- Overfilled bags — no clean edge for the sealer to weld properly.
- Wrinkled film at the seal line — even a small wrinkle can create a channel for air to re-enter.
- Reusing bags with old pinholes or seal lines — freezer bags aren’t indefinitely reusable, especially once punctured.
Most of these failures come down to one thing: a bag that wasn’t built for the kind of handling hunting meat requires.
GardaPack’s Prime Bags are engineered with puncture resistance and a thicker, more forgiving seal line built for bone-in cuts and uneven surfaces.
For Processors and Bulk Operations
GardaPack helps processors, ranch operations, and small meat businesses scale up, offering wholesale pricing, vacuum seal bags, and roll stock built for high-volume runs.
- Consistency you can count on at scale. We hold the same barrier quality across every bag in a bulk run.
- GardaPack offers roll stock and bulk case pricing for cost savings and precise size matching.
- Chamber sealers become the standard tool at volume — faster per cycle, no workarounds for liquid or marinated product.
From Field to Freezer, Protected the Whole Way
You already do the hard part right: the shot, the field-dress, the cooling, the trim. Don’t let the one step that’s supposed to be the easiest part be the one that quietly undoes all of it.
GardaPack’s Prime Vacuum Seal Bags for hunters are built for genuine barrier performance, seal integrity, and puncture protection, carrying your harvest smoothly from field to freezer.
Every bag is engineered to help keep oxygen out and moisture from escaping, helping protect your harvest until you’re ready to cook it.
After all the time, money, and effort you’ve put into this season’s harvest, don’t let the wrong bag undo it in the freezer.
[Shop GardaPack’s Vacuum Seal Bags for Hunters →]
Frequently Asked Questions
What actually causes freezer burn?
Oxygen reaching the meat’s surface combined with moisture sublimating out of the tissue into the surrounding air space, where it re-forms as ice. Limit both, and you dramatically reduce the risk of freezer burn.
Can GardaPack’s vacuum seal protect bone-in meat safely?
Yes. For bone-in cuts, wrap exposed bone ends in parchment or freezer paper before sealing, and use our heavier-mil , high-barrier bag with the appropriate film thickness for added puncture protection.
How long does venison last in the freezer?
Properly trimmed, vacuum sealed in a high-barrier bag, held at 0°F or below: roughly 9–12 months.
